Ready to embark on a time-honoured tech tradition?
Waitlists are a great way to gather contact information from prospective customers, control growth for your product, and qualify early customers so you can bring in the right people at the right time. But they're bloody hard to do properly.
There's no one solution for every startup. Do you want to add incentives so users can move up the list? Do you want more friction and higher quality signups or less friction to pump those numbers up to get investors excited? All good considerations. Every waitlist is different.
At Yonder, we knew we'd need a waitlist to control our growth and give us a mechanism for qualifying customers before they applied for a credit card with us. So we went looking around the internet and found plenty of waitlists that we loved. When we started digging below the surface on how they worked, we found that most of them were a bit too code-heavy for us replicate. Our engineers were too busy building a credit card, so I set out with Tim (our CEO and my no-code partner-in-crime) to create an amazing waitlist experience without needing an engineer to do any work.
Fast-forward six months, and we've had 87% waitlist sign-up completion (we asked about 15 questions in total) with 18% of all waitlist sign-ups becoming customers (the industry average for similar credit products is less than 1%). We're obviously really happy with how our waitlist has worked out for us.
Before you get started
Set your requirements. These were ours:
- Pre-screen potential customers so we could invite the right customers at the right time
- Control demand so we could grow at a pace that suits us
- Give our customers a delightful first experience with Yonder
- Be GDPR compliant, safe and secure for our customers
You'll need these tools
- Webflow - a codeless website builder. Generally seen as the industry leader, but there might be better options (around £40 a month, but varies on what you need). This is where your customers will sign-up.
- Zapier - a tool that connects other services together on the internet. This is what connects all the different tools you use.
- Airtable - platform for creating and sharing relational databases. This is where your records will be stored.
- TypeForm - survey tool for gathering customer information. This was how we screened applicants to see who was right for us.
- Optional: Mandrill - email marketing tool by Mailchimp. We use this to send emails to waitlist members.
And you'll need to set them up
- You’ll need to create accounts for all of the above and add the various integrations to each other. Most of these will be handled in Zapier, so get comfortable playing around in there. It’s really quite easy to use but I’d commit some time to understanding it all before you start building.
- You’ll need a website on Webflow, so if you haven’t got that I’d go back about a million steps and get that bad boy designed and built before you read this.
- If you want to send some optional emails, you’ll need email campaigns designed in HTML so you can send them via Mandrill. They can be simple text ones but it’s a nice chance to build your brand with new customers so I encourage you to put some effort into it.
- Set up a database in Airtable and give it a name like “Your Company Waitlist” or whatever works for you.
Okay, here's a quick overview
Once a user types in their name and email, it kicks off a flow in Zapier with a series of steps that:
- Adds their name and email to Airtable
- Redirects them to TypeForm to complete a waitlist survey (where we ask a bunch of questions about their lifestyle and financial history)
- Adds their completed survey responses to their original Airtable record
- Then redirects them to a success page
- Send them a confirmation email saying we'll be in touch
So why didn't we just have a button that went to a TypeForm survey? You could do that, but then it wouldn't be a delightful waitlist, would it? We put the effort into make the entire experience as good as it could be because we wanted potential customers to get a great feeling about the Yonder brand from the second they first engaged with us. Taking name and email first then redirecting to TypeForm meant we could gather high and low intent customers and see that crystal clear in our database when we wanted to start inviting customers to apply. We deliberately added as much friction as we could so that those who got all the way to end really, really wanted to try us out.
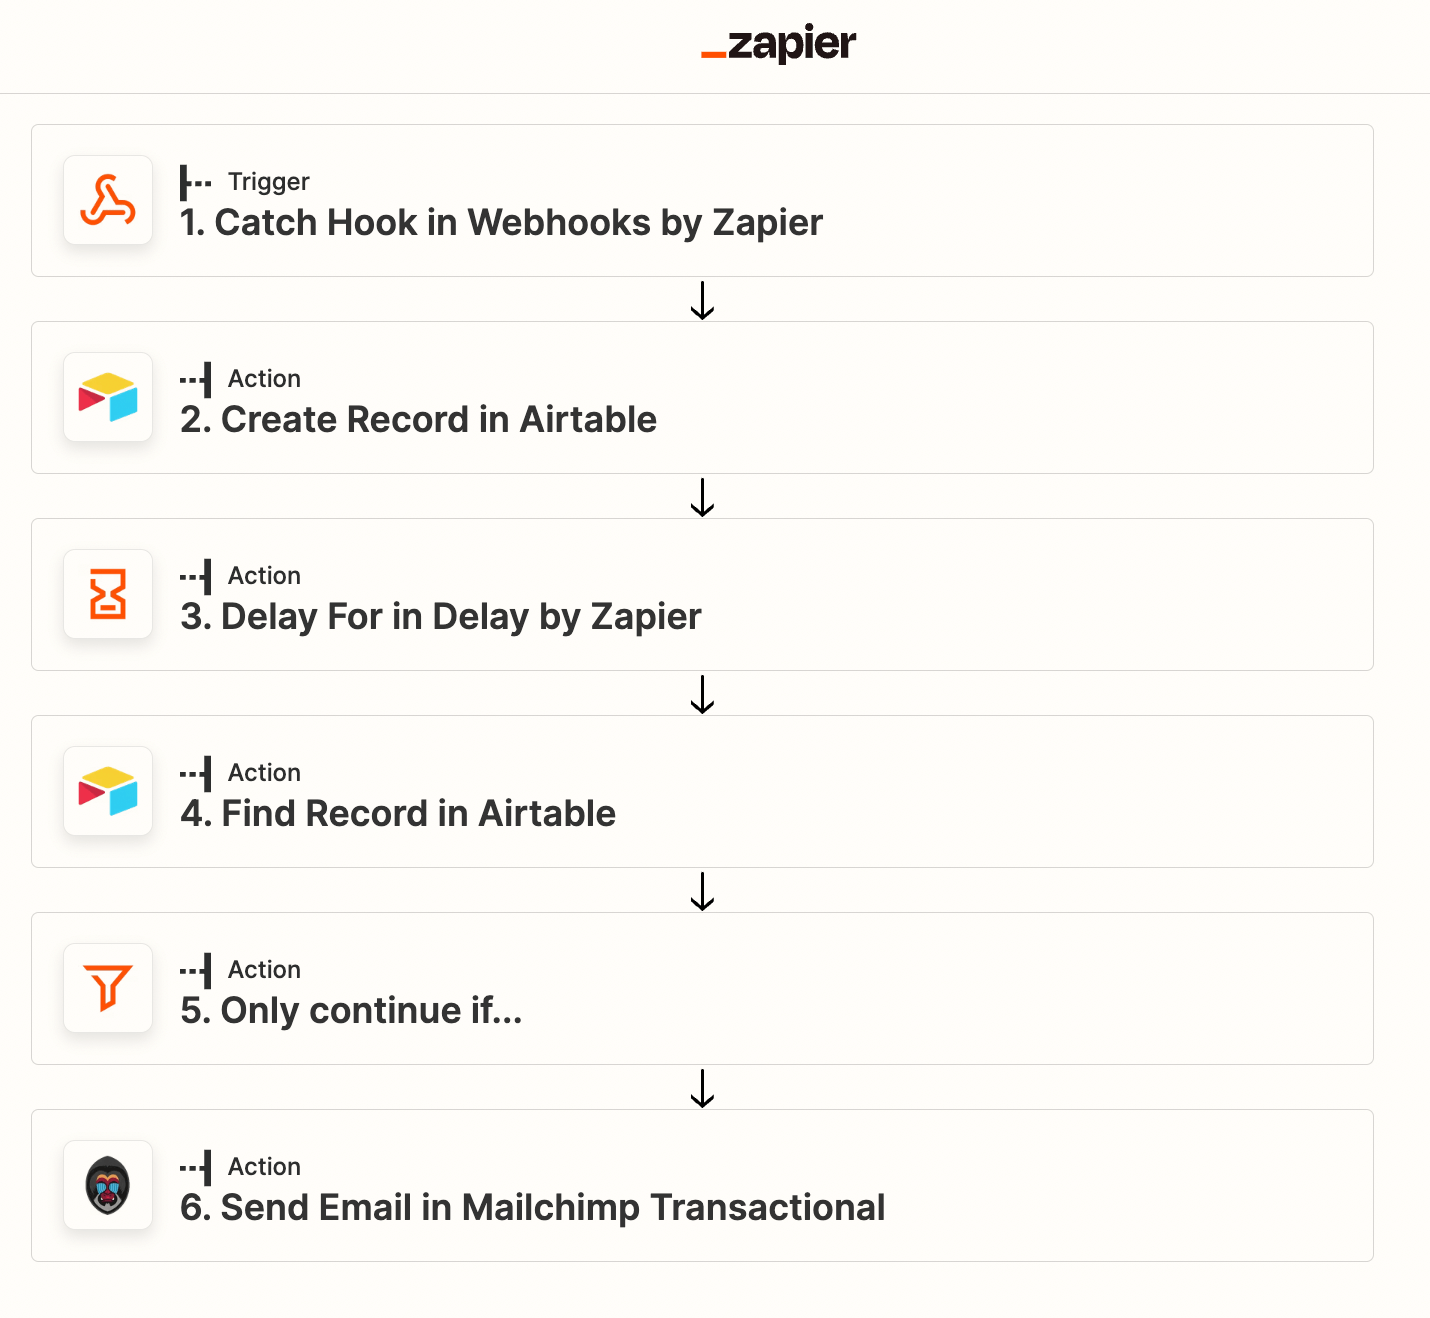
It’s really quite impressive what you can do on the internet today. We’ve tweaked and improved our process a lot over the last six months and improved part so the experience with some basic Javascript along the way. Some bits of this I outline are not from our V1 waitlist we launched with in April, but have been added along the way. In general, you can probably get this entire thing live in a single day. How exciting. Here’s what the flow looks like in Zapier.

Right, let's get started
Step 1: User lands on your website and adds their name and email to your waitlist
When a prospective customer comes to our website, we tell them a bit about Yonder then give them the option to begin what we call a 'pre-application' – it helps us gather more information about someone before they apply for a Yonder card. We can then invite them to formally apply if we think they're suited for us right now and are likely to be approved. We’ve played around with various different bits of copy here, but essentially this is where a user would be adding their name and email to your waitlist. You'll need to have your Webflow website setup and have created a form on your site for users to complete.
.png)
Step 2: User's name and email get added to your Airtable database
Using Zapier’s “Webhooks by Zapier” to identify when a form completion happens in Webflow and sends the user name and email over to Airtable. We did add a little Javascript to this form, which is optional, that lets us track UTM parameters of some links so we can see marketing attribution for our leads. You can sort of do this manually by asking a “How did you hear about us” question later on in your sign-up, so I reckon keep it simple for now.
We also use a bit of JavaScript code which generates a unique code for every entry so we can tie responses to a unique code and not their email. This is again optional and up to you, but is possibly more secure than matching to an email or a name.
Step 3: User is redirected to a sign-up survey to gather more information
In Webflow you can set a redirect URL after a form completion, so we’d send them to a TypeForm survey where we’d ask them a series of qualifying questions to get to know them better and showcase our brand tone-of-voice a bit. We have an 87% completion rate of our survey which includes 10+ questions so I think the extra effort to make it enjoyable was well worth it. We asked questions about their rough level of income, where they live and how long they’ve been in the UK.
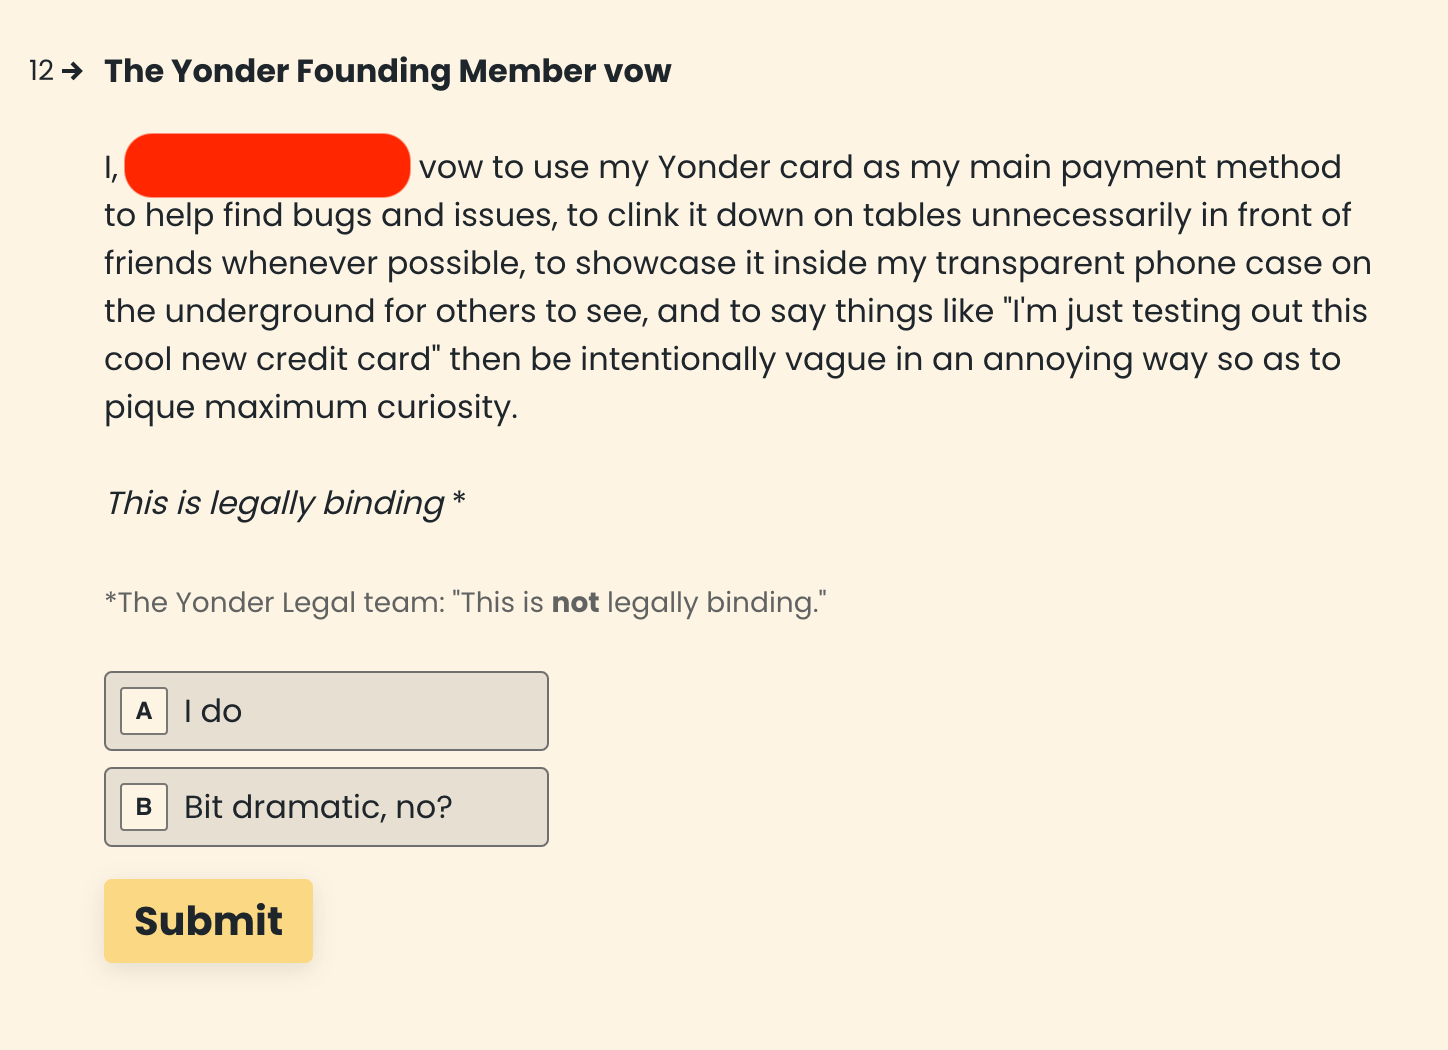
These are obviously all important questions for a credit card company to consider and helped us identify the customers we wanted trying out the product earlier than others. We also asked some questions which had nothing to do with their application and was just a chance for me to write something funny and make the survey a bit more palatable. I added the one below at about 2am on the day of our launch just for the lols and loads of people screenshotted it and sent it to us saying how much they enjoyed the survey.

Optional Step: Send an automated follow up email if they drop off before completing your survey
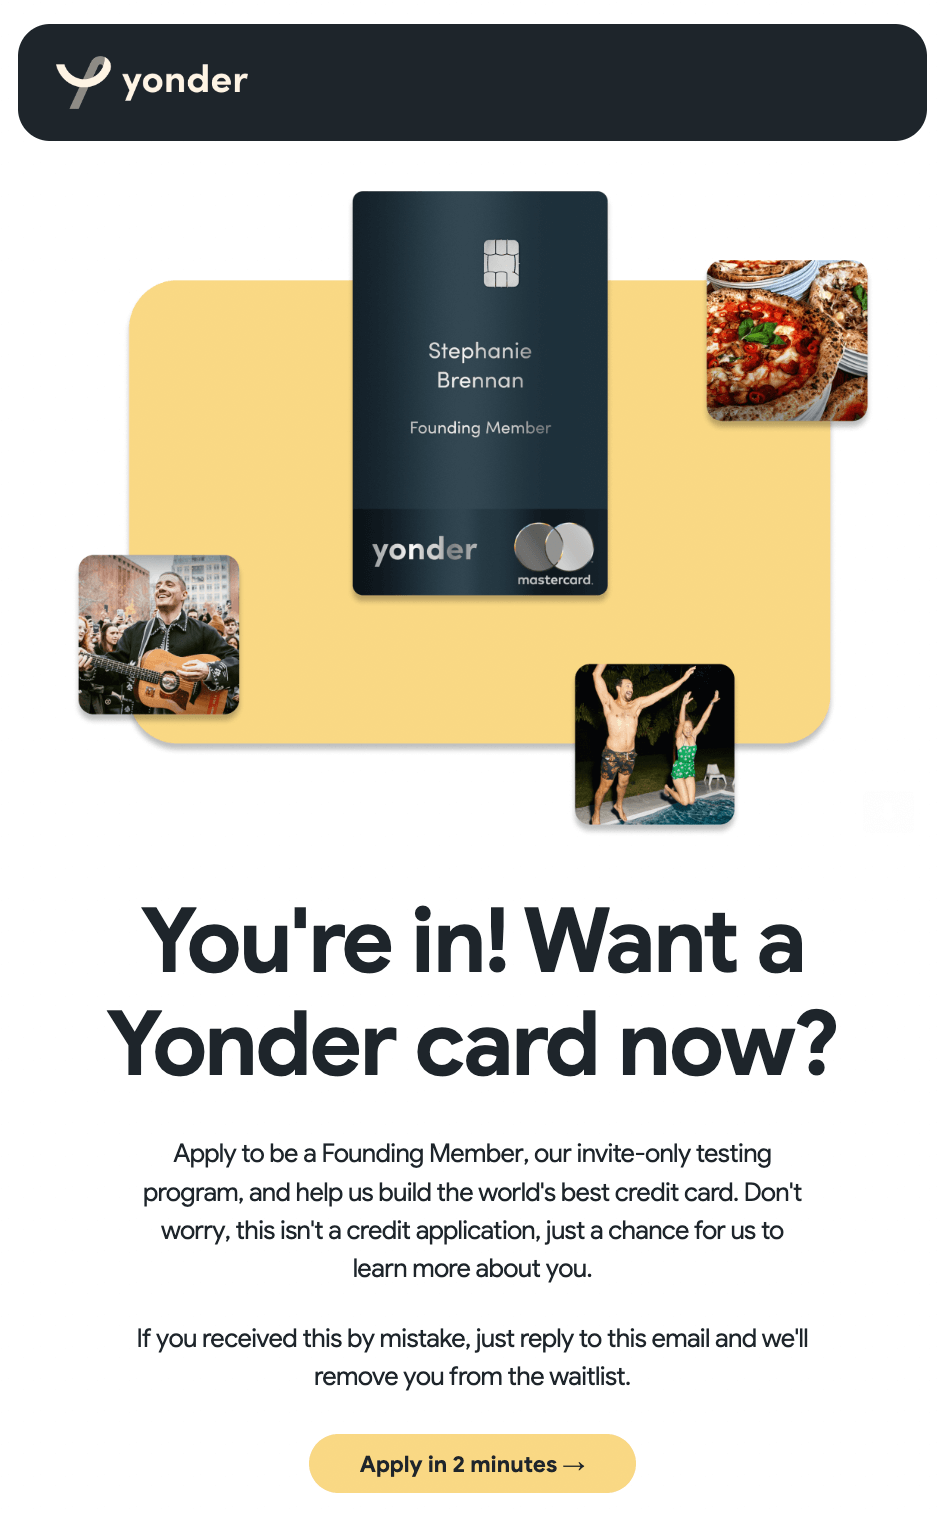
While a user was completing the survey (or not) we set a 15-minute delay for Zapier to check if a survey was completed in TypeForm. If not, it would send a reminder email to the user with a link to the TypeForm for them to finish later. I can't be bothered to go and look at the data but I suspect this added around 20-30% more completions to our survey. Some people are in a hurry and an email is something they can come back to after work or on the weekends. I recommend doing this if you have time.

Step 4: Redirect users back to a 'success' page on your website
Once they complete the Typeform, we then redirect them back to a Webflow ‘success’ page using the TypeForm redirect feature that thanks them for completing the survey and let’s them know we’ll be in touch when it’s the right time to invite them. You can see what ours looks like by filling out our survey.
Step 5: Attach a user's survey information to their original Airtable record
We use a Zapier trigger to (a) search for the record added to our database based on the unique code; (b) append the results to the record with the survey results. This is what we would end up seeing in Airtable. Make sure you check up on the GDPR rules wherever you are so that you’re capturing, storing and accessing data responsibly. We restricted access to this entire system to just a few people at Yonder.
Optional Step: Send an automated thank you email to users after they sign up
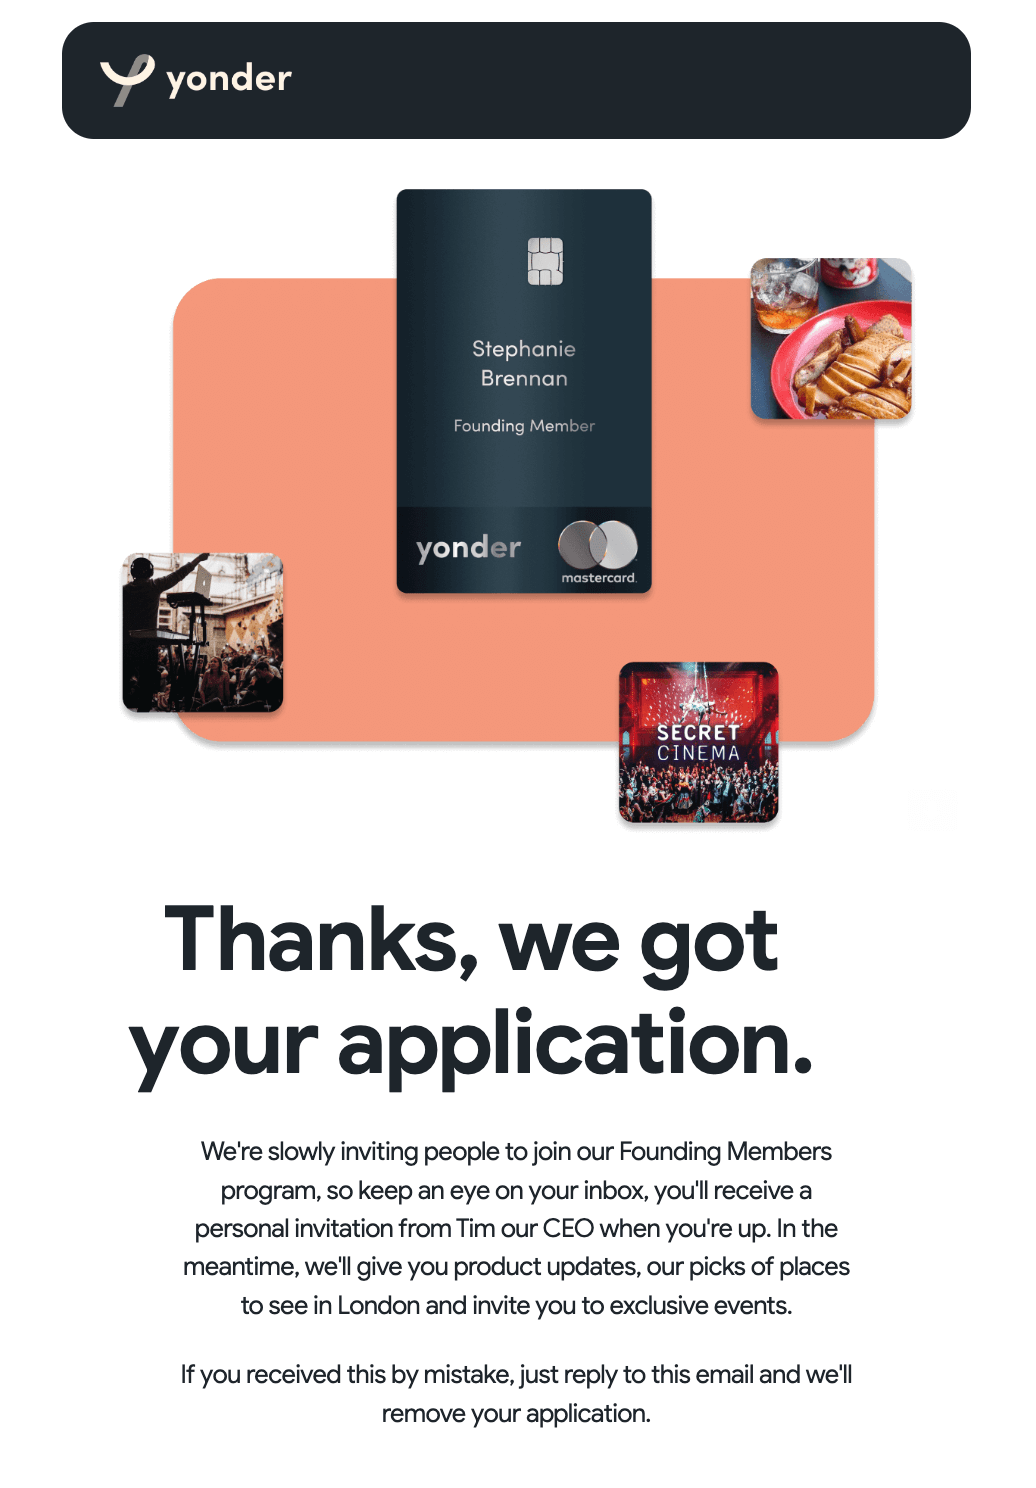
We then sent a final automated email from Mandrill (Mailchimp) letting the user know that they've completed the waitlist application and we’d be in touch.

And that's it. Every day after our launch we would come into our database and select the users who thought would be a good fit to try out Yonder during our beta. Tim would then personally invite every single one to download the app and sign up. It gave our prospective customers are really nice first experience with us, something I think is incredibly important for a new financial service. We've continued to improve these experience over the last few months, adding in some bits of code along the way to give us better marketing attribution and cut out some manual steps that we were happy to launch with back in April.
Here are some FAQs
How did we control for duplicates?
We didn't really. We can see in Airtable if someone completes the form more than once, and generally, we'd take their first survey results as the source of truth. We saw very few duplicates overall, but sometimes Zapier might trigger an event twice or someone enters their result twice so it will happen.
What other learnings did we have?
Generally, a shorter survey isn't always necessarily better. Ours was really long but we put so much effort into every screen so it all felt quite fun. We had unique images tied to the question, my poor self-deprecating humour throughout, and even added questions just for the fun of it. The end result was we got more useful data from potential customers and they got a fun experience with a new brand they'd just heard of. Don't fall into the trap of funnel optimising everything in life.
If you have any questions, you can find me on LinkedIn.
Good luck!


.jpeg)


.png)
.png)


